For all open-source aficionados, Ubuntu 22.04 stands tall as a robust and welcoming operating system. It boasts a library of open-source alternatives to mainstream tools. If you’re looking for a reliable solution for file transfer, FileZilla is an amazing tool. This article serves as a concise guide, walking you through the step-by-step process of installing FileZilla on Ubuntu 22.04. Whether you’re a seasoned Ubuntu user or a newcomer to the Linux environment, this tutorial aims to simplify the installation process, empowering you to effortlessly manage your file transfers with ease and efficiency. Let’s dive right in.
Update system packages
Similar to any other installation, you should make it a practice to update the system repositories. It helps avoid any conflicts or errors due to pending updates. Open your terminal and run the following:
$sudo apt update && sudo apt upgrade -y
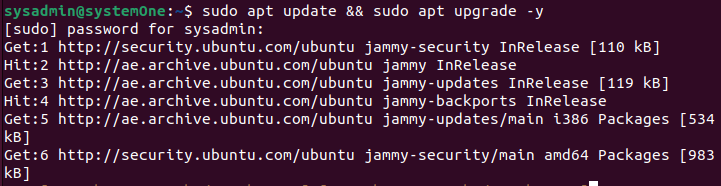
This will check for any pending updates and perform the operation to make sure that your system is up-to-date. Once this completes, we are ready to install Filezilla using any of the mentioned methods.
Method 1: Install Filezilla on Ubuntu through the Ubuntu Software Center
If you prefer doing your tasks visually, you can install Filezilla through the Ubuntu Software Center.
Step 1: Open the Ubuntu Software Center from your application menu or your task bar.

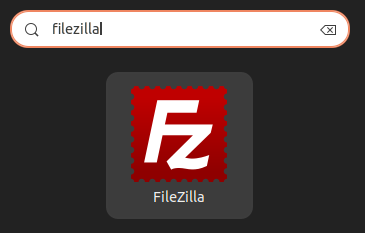
Step 2: Pull up the search bar from the search button in the upper-left corner. In the search bar type “FileZilla” to find the application.
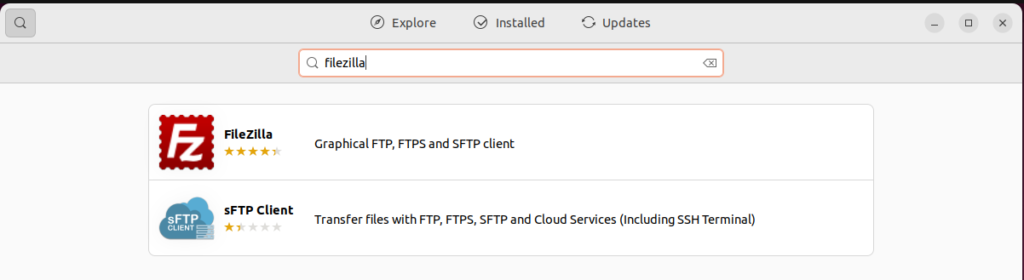
Step 3: Select the FileZilla entry from the search results.
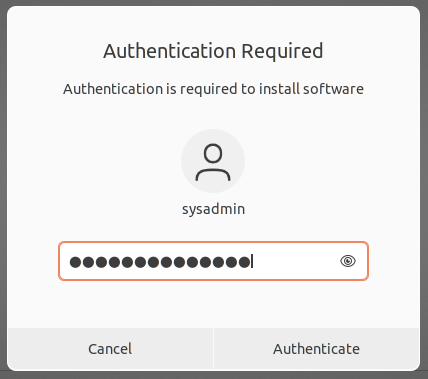
Step 4: Click on the “Install” button. You will be prompted to enter your system password to authorize the installation.

Step 5: Wait for the Software Center to download and install FileZilla.

Launching FileZilla through GUI
After installation is complete, find FileZilla in your application menu.
Now you can launch FileZilla and start managing your file transfers seamlessly.
Uninstalling FileZilla through the Ubuntu Software Center
Uninstalling FileZilla through the Ubuntu Software Center is a straightforward process. Follow these steps:
Similar to the installation method, you can go into the Ubuntu Software Center and pull up the application page for FileZilla.
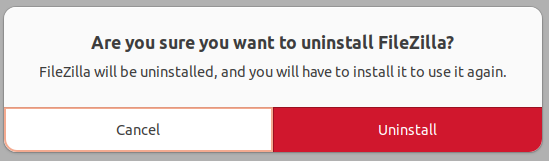
You will see the red “Remove” button with a bin on it; click on it to initiate the uninstallation process.

You will be asked to confirm the process.
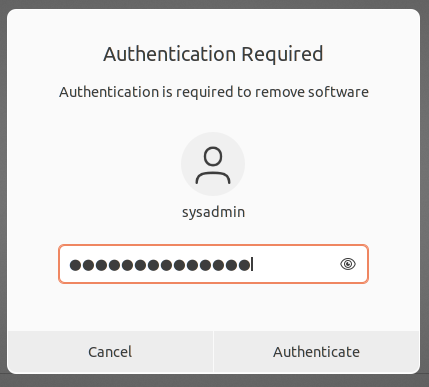
You may be prompted to enter your system password to authorize the uninstallation.
Wait for the Software Center to uninstall FileZilla. After it is done, you will see the applications page show the green installation button again.

Once the uninstallation is complete, FileZilla will be removed from your system.
By following these steps, you can easily uninstall FileZilla through the Ubuntu Software Center. The provided screenshots offer visual guidance at each stage of the uninstallation process.
Method 2: Install Filezilla on Ubuntu through the terminal
The process for installing FileZilla through the terminal is very straightforward. Fire up your terminal, and run the following:
$sudo apt install filezilla -y
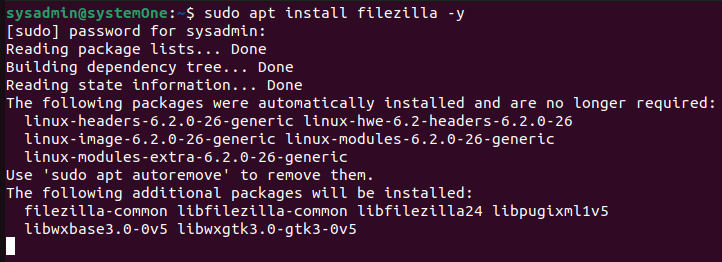
Press Enter and, if prompted, enter your password to authorize the installation.
Wait for the installation to complete. The terminal will display progress, and once it’s finished, you’ll see a message indicating that FileZilla has been successfully installed.
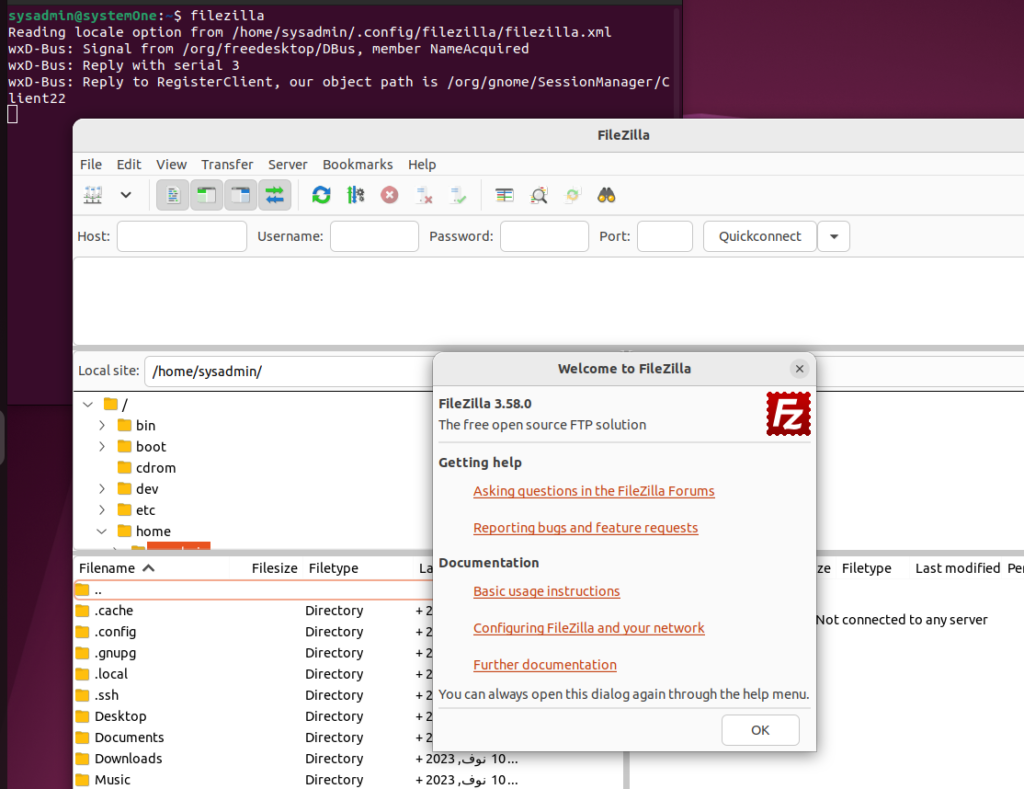
Launching FileZilla through the terminal
Now, you can launch FileZilla from the application menu or by typing filezilla in the terminal.
$filezilla
Uninstalling FileZilla through the terminal
If for any reason you are done with FileZilla and want to delete it from your Ubuntu setup, you can simply fire up your terminal and run the following:
$sudo apt autoremove filezilla --purge -y
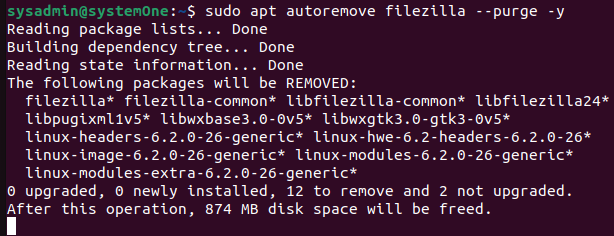
This will remove FileZilla along with any configuration files and relevant data.
Conclusion
Installing FileZilla on Ubuntu 22.04 is a straightforward process that can be accomplished using either the command line or the graphical Ubuntu Software Center. Both methods are equally effective and will result in a fully functional FileZilla installation ready for use. Whether you prefer the precision of the command line or the simplicity of the GUI, the choice is yours. Once FileZilla is installed, you can easily connect to remote FTP servers and manage files with ease. To learn more about FileZilla, you can explore the official website.