FFmpeg is a well known multimedia framework that offers users to record, convert, and stream audio and video. It is a favorite among developers, content creators, and anyone who needs to manipulate multimedia data. With the release of Ubuntu 24.04, installing FFmpeg has become more straightforward.
This guide will walk you through the different ways to install FFmpeg on Ubuntu 24.04, ensuring you can choose the method that best fits your needs.
Table of Content
- How to Install FFmpeg on Ubuntu 24.04
- Method 1: Using the Apt Package Manager
- Method 2: Using the Snap Store
- Method 3: Using the App Center
- Method 4: Using the Tar File
- How to Remove FFmpeg on Ubuntu 24.04
- Conclusion
How to Install FFmpeg on Ubuntu 24.04
FFmpeg is one of the efficient tools for handling several multimedia files. Here are several methods to install it on your Ubuntu 24.04 system:
Method 1: Using the Apt Package Manager
The apt package manager is the easiest and most recommended method to install FFmpeg on Ubuntu 24.04. It ensures that you get the updated version of FFmpeg directly from the Ubuntu repositories.
Step 1: Update the package lists
First, update your system’s package list with the following command:
sudo apt update
Step 2: Install FFmpeg
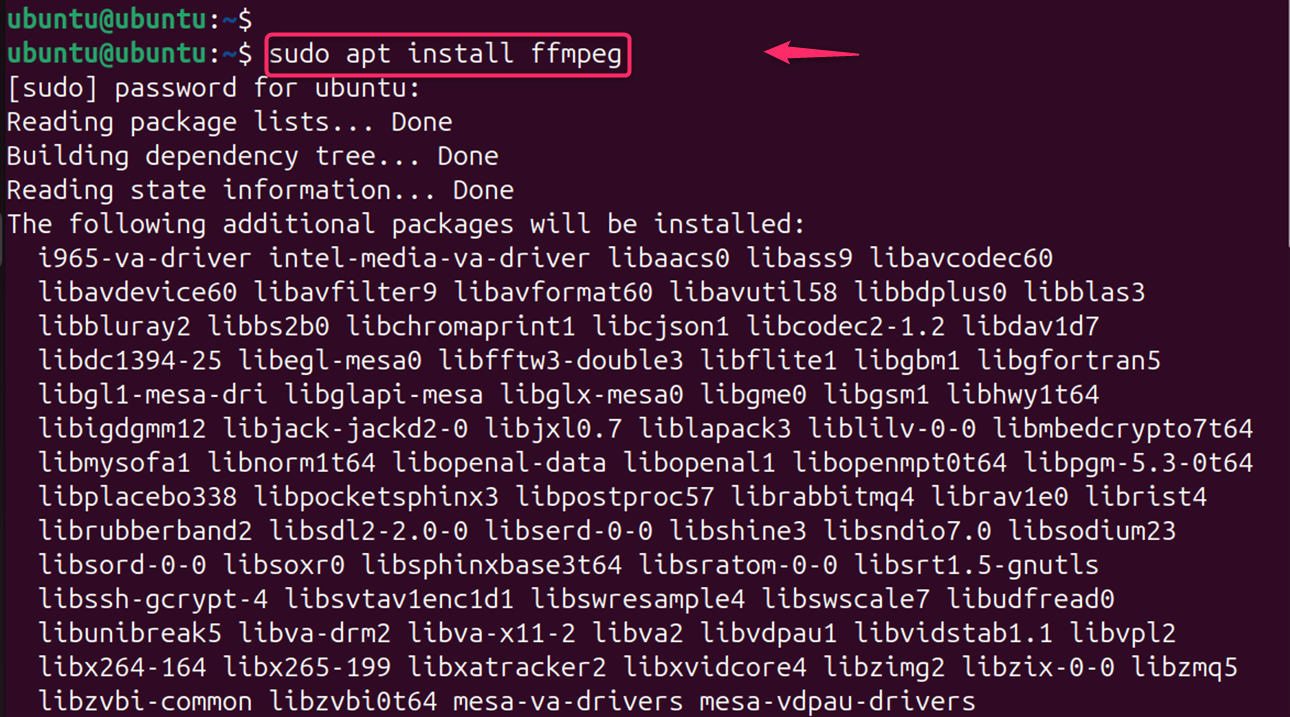
The apt package manager is the most straightforward and ensures you receive the latest updates. Once the system is updated, now, users can install FFmpeg through the below command:
sudo apt install ffmpeg
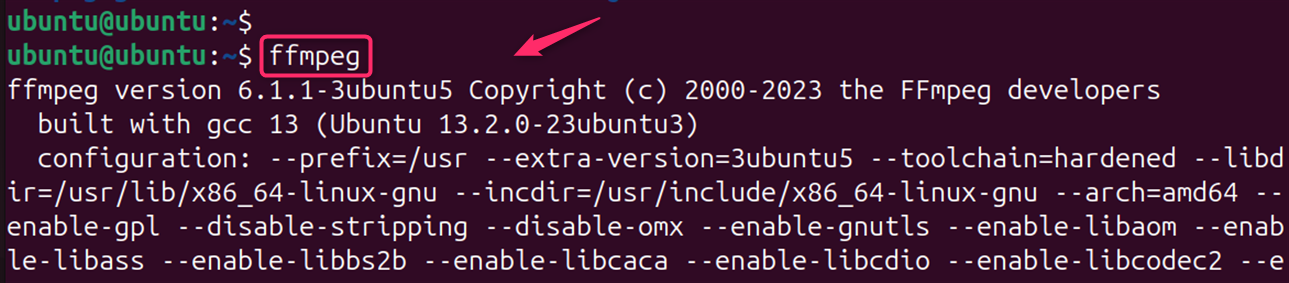
Step 3: Verify the FFmpeg version
After the installation is done, users can authenticate the FFmpeg version installed on the system with:
ffmpeg --version

Method 2: Using the Snap Store
The Snap Store provides a sandboxed version that doesn’t interfere with system packages. Snap Store provides a platform for distributing applications that include all their dependencies, ensuring they work on all Linux distributions that support Snap.
Step 1: Install Snap
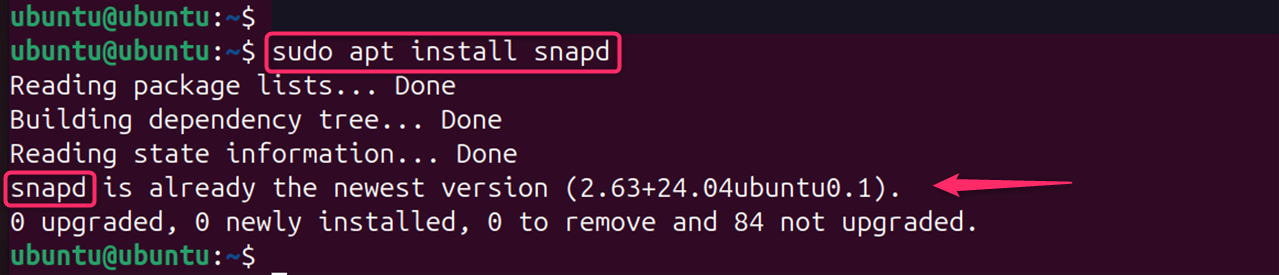
Snaps are self-contained packages that include all dependencies. Users can authenticate that Snap is installed on your system:
sudo apt install snapd
Step 2: Install FFmpeg
Install FFmpeg from the Snap Store:
sudo snap install ffmpeg

Method 3: Using the App Center
The App Center offers a user-friendly graphical interface, and the tar file method gives you control over the installation process. Ubuntu’s built-in App Center is another convenient way to install FFmpeg.
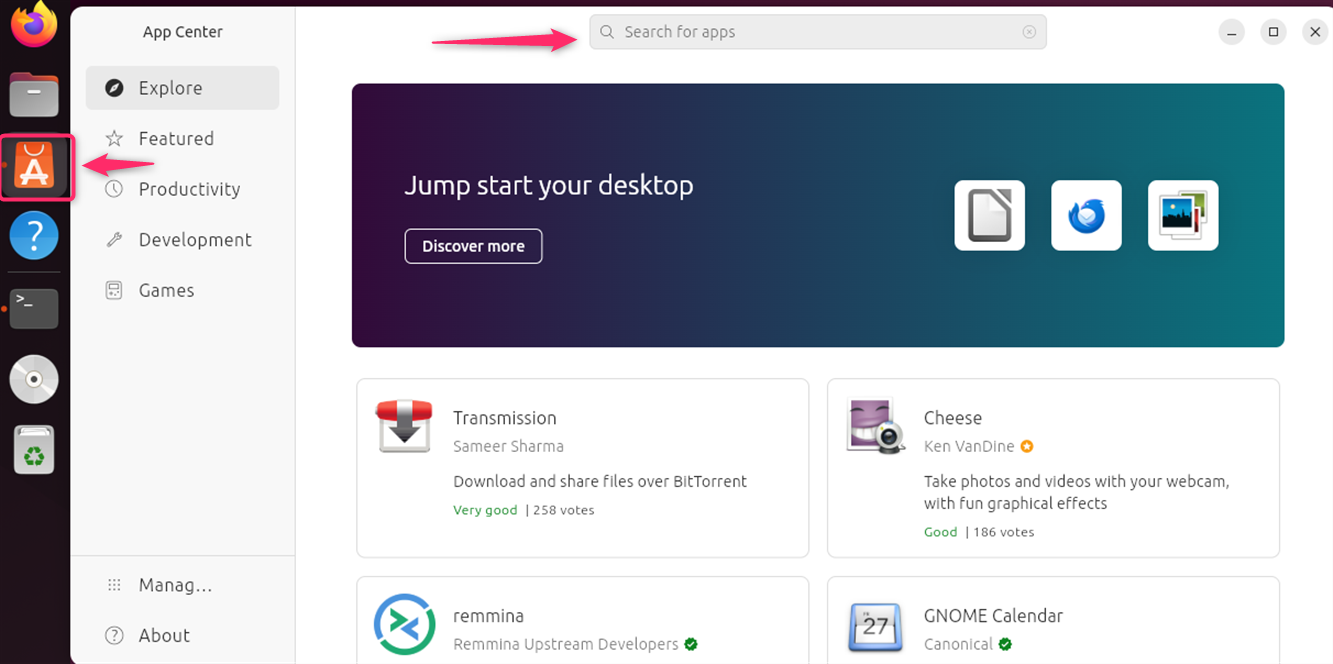
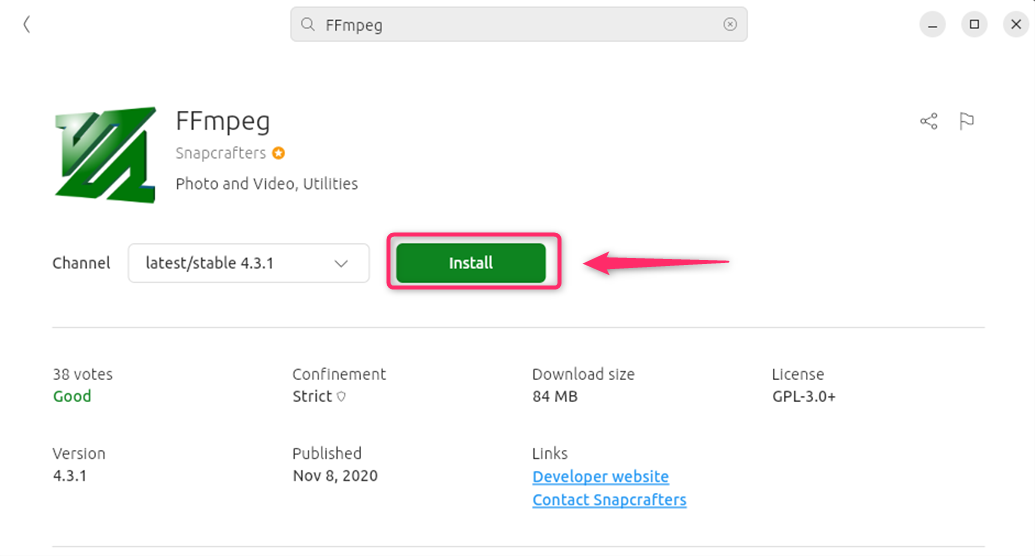
Step 1: Open the App Center
First of all, open the App Center from the desktop or application menu:
Step 2: Search for FFmpeg
Now, users can search for FFmpeg in the search box:
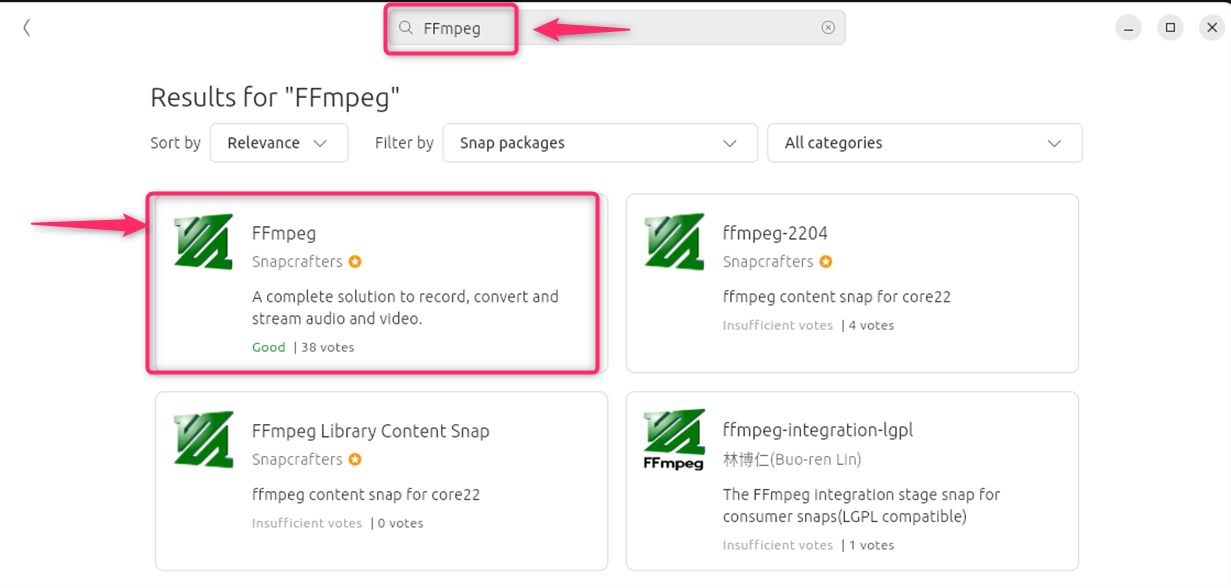
Step 3: Install FFmpeg
Click on the application and then click the ‘Install’ button:
Method 4: Using a Tar File
For users who prefer to install FFmpeg from a source tarball, this method is more hands-on and requires manual installation of the binaries.
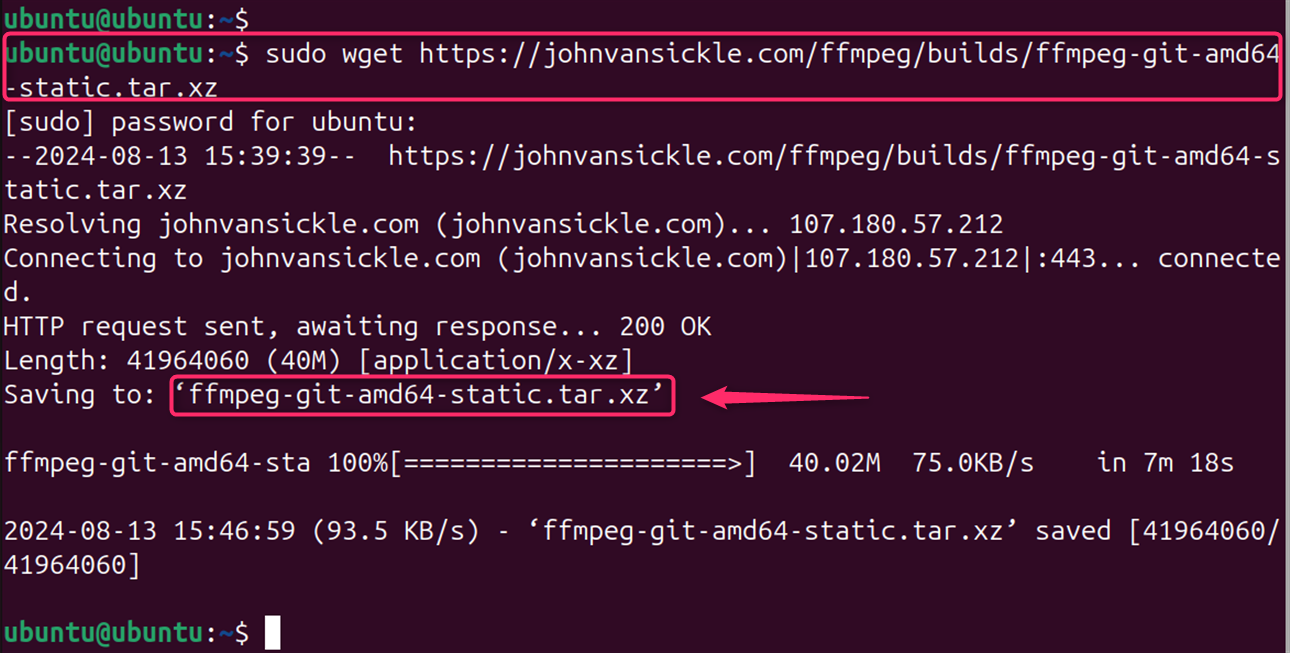
Step 1: Download the FFmpeg Tar File
Download the FFmpeg tar file: Obtain the desired FFmpeg version from the official FFmpeg website:
sudo wget https://johnvansickle.com/ffmpeg/builds/ffmpeg-git-amd64-static.tar.xz
Note: Ensure you have the required development packages installed. You can usually find a list of dependencies in the FFmpeg documentation.
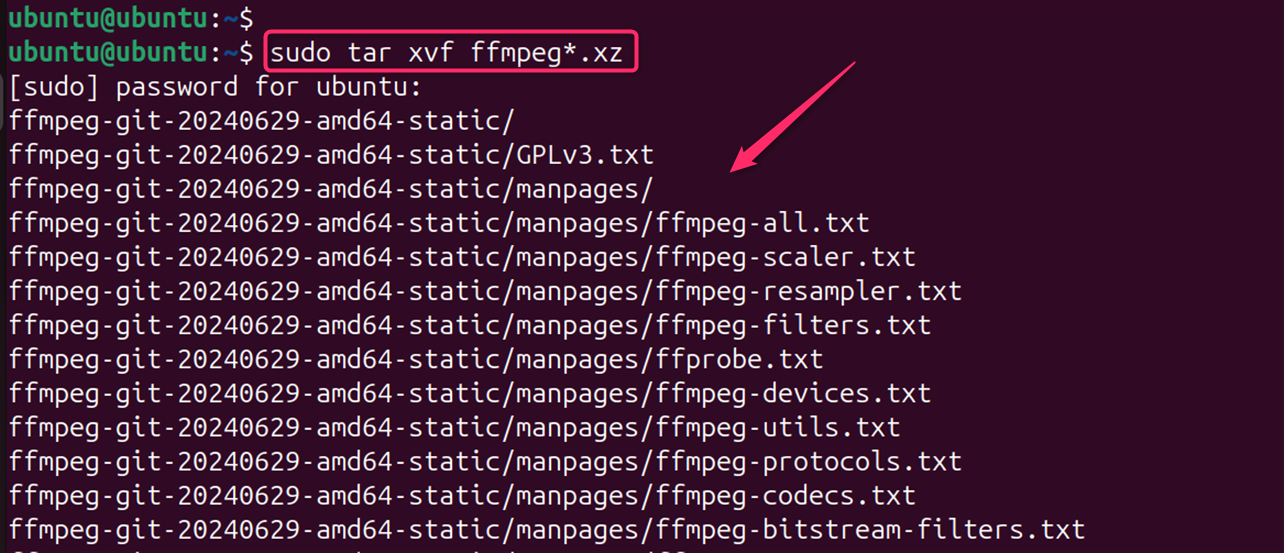
Step 2: Extract the Tar File
Now, you can extract the contents of the tar file as below:
sudo tar xvf ffmpeg*.xz
Users can Replace <version> with the actual version you downloaded.
Note: This method is more complex and time-consuming compared to using the apt package manager, which provides a more streamlined and efficient installation process.
Step 3: Install FFmpeg
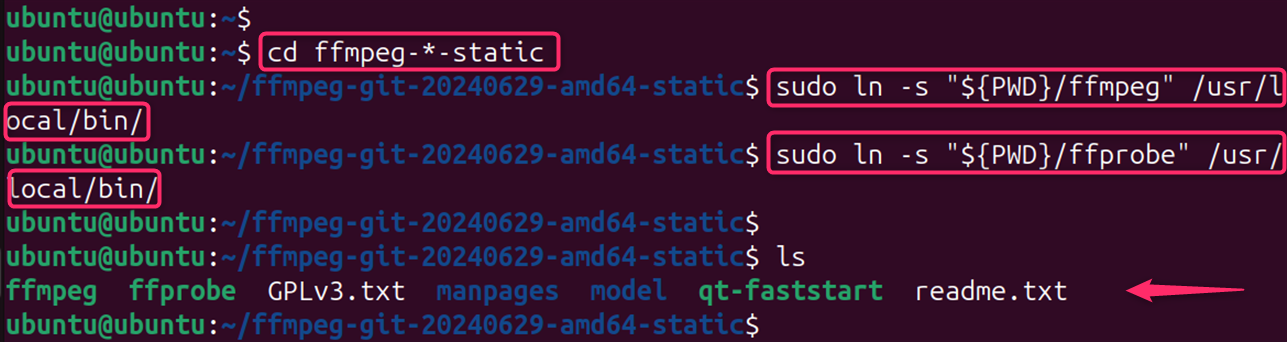
Navigate to the FFmpeg directory and install the binaries:
cd ffmpeg-*-static
sudo ln -s "${PWD}/ffmpeg" /usr/local/bin/
sudo ln -s "${PWD}/ffprobe" /usr/local/bin/
ls
You can customize the build options with additional flags if needed:
ffmpeg
Note: Installing FFmpeg from a tar file requires you to manually install all necessary dependencies. This can be time-consuming and error-prone. The configuration process might involve various options and flags, which can be complex for users unfamiliar with FFmpeg.
How to Remove FFmpeg on Ubuntu 24.04
However, there may come a time when you need to uninstall FFmpeg, perhaps to upgrade to a newer version or to troubleshoot an issue. Remember to always check the compatibility of your system and the version of FFmpeg you are installing:
Method 1: Using APT Package Manager
The simplest way to uninstall FFmpeg is through the APT package manager. If you installed FFmpeg using APT, you could remove it with the following commands:
sudo apt remove ffmpeg
sudo apt autoclean && sudo apt autoremove
This removes FFmpeg and any unused dependencies from your system.
Method 2: Removing Manually Installed FFmpeg
If you’ve installed FFmpeg from source or via a method other than APT, you’ll need to locate the binary and remove it manually. You can find the installation path by typing:
which ffmpeg
Once you’ve located the binary, you can remove it with:
sudo rm /path/to/ffmpeg
Users can modify “/path/to/ffmpeg” with the actual path.
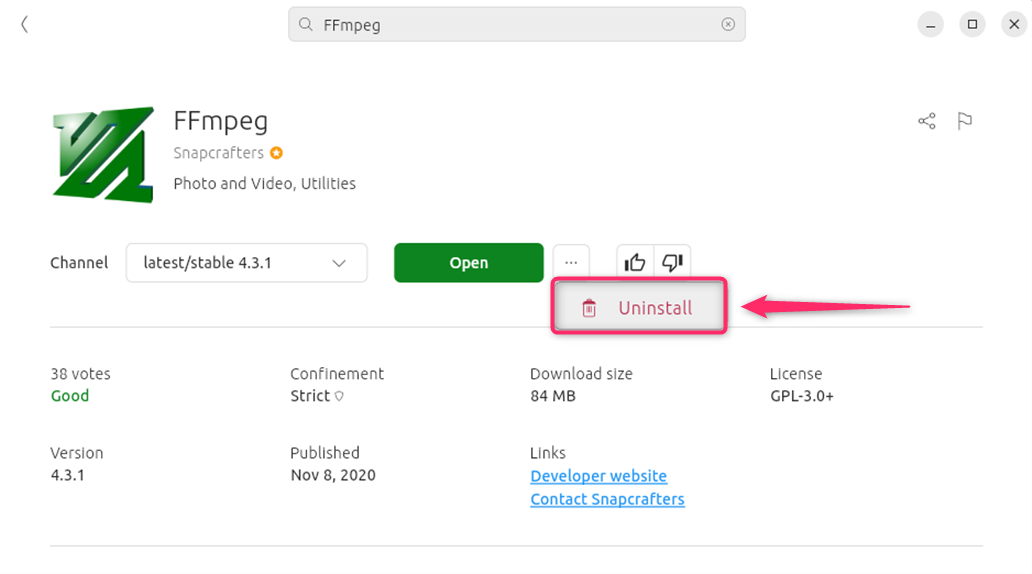
Method 3: Using the App Center
If you installed FFmpeg through the Ubuntu App Center, you could uninstall it by opening the App Center, clicking on ‘Manage,’ then finding FFmpeg, and using the Uninstall option:
Remember, before uninstalling FFmpeg, make sure that no applications are dependent on it, as this could cause them to malfunction.
Conclusion
To install FFmpeg on Ubuntu 24.04, you can use the apt package manager. Begin by updating your system’s package list with sudo apt update. After the update, install FFmpeg by running sudo apt install ffmpeg. Once the installation is complete, you can verify it by checking the installed version with ffmpeg -version. This process ensures that you have the latest version of FFmpeg installed on your system.
While the App Center is a convenient tool for many applications, it’s not the ideal method for installing FFmpeg on Ubuntu 24.04. Using the terminal or Snap is the recommended approach for a smooth and efficient installation.