
Recalling IP addresses for system identification can be challenging, making it very difficult for you to pinpoint a server or desktop in a mesh of computers. For this very purpose, every computer is assigned a human-readable name, also known as a hostname. Within Ubuntu 24.04 and other Linux distributions, multiple hostnames exist, each with distinct functions. Depending on your needs, you can use various methods to change hostname in Ubuntu, offering flexibility in customization and network management.
Also, read How to change hostname in Ubuntu 22.04.
How to check the hostname on Ubuntu 24.04?
Before looking into the ways we can change the hostname, let’s explore how to check the currently set hostnames in your system. Fire up your terminal and type:
$hostnamectl
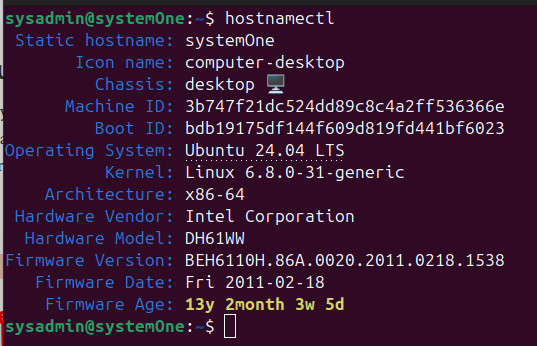
You will hear that there are three different hostnames set for your Ubuntu. Let’s explore them
Types of Hostname in Ubuntu
In Ubuntu 24.04, there are three types of hostnames, each serving distinct purposes:
Static Hostname:
It is stored in the `/etc/hostname` file. It Remains unchanged until manually edited or modified using tools like `hostnamectl`. Crucial for initializing the kernel hostname at boot.
Transient Hostname:
It is a temporary and can be set by DHCP or other network services during system boot. It reverts back after a reboot. It serves as a fallback value from network configuration when a static hostname is not set or valid.
Pretty Hostname:
A high-level name stored in `/etc/machine-info`. It can include special characters. It has fewer restrictions on characters and length compared to static and transient hostnames. It is limited to accepted characters of Internet domain names, with a maximum of 64 characters due to Linux limitations.
Understanding the differences between these hostname types is essential for effectively managing system identification and network configuration in Ubuntu 24.04. Now let’s see how we can change it.
How to Change Hostname on Ubuntu 24.04
Picking a good hostname for your computer is important. It helps you easily identify and manage your systems, especially when you have many. Think of it like giving your computer a nickname!
Let’s get started.
Method 1: Using the hostname command
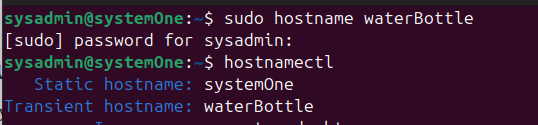
You can quickly change your Ubuntu computer’s name using the `hostname` command in the terminal. This is temporary though, as it only changes the transient hostname. Just type:
$sudo hostname new_name
You can replace “new_name” with your desired name and press enter. Your password will be required. So, let’s say we want your computer to be named “waterBottle”. You can do that using:
$sudo hostname waterBottle

If you run “hostnamectl” you will see that this has only changed the transient hostname.
For a permanent change, we have different methods.
Method 2: Using the hostnamectl command
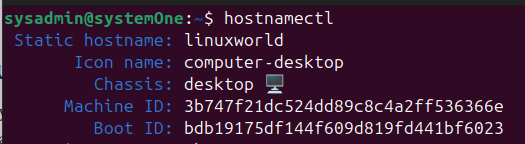
Switching your Ubuntu system’s name to something more memorable is easy with `hostnamectl`. This command updates both temporary and permanent settings, so you won’t need a restart right away. Just open the terminal and type
$sudo hostnamectl set-hostname new_hostname
You need to replace “new_hostname” with your choice. Hit enter and provide your password. So, let’s say if I want my computer to be named “linuxworld”, here’s the full command I will execute:
$sudo hostnamectl set-hostname linuxworld

That’s it! Your system will now identify itself with the new name. You can check the change using “hostnamectl”.
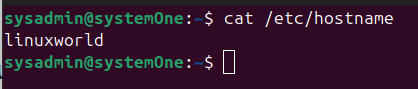
$cat /etc/hostname
Similarly, you can open up the “hostname” file to make sure that the hostname has been permanently changed using the following:
Method 3: Using the Network Manager
In case you want to change the static hostname for your computer, you can also use Network Manager. Now, it is available through GUI and through the terminal command. You can launch the GUI by executing the following:
$nmtui
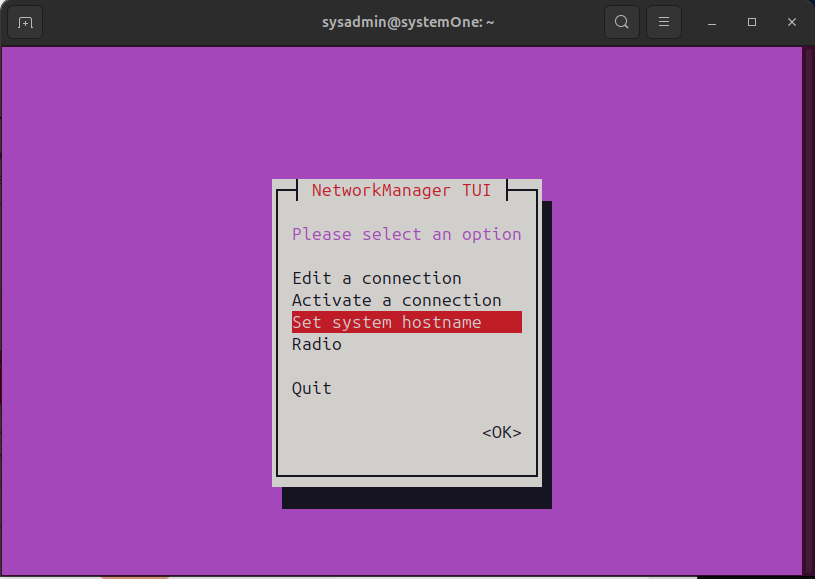
Here, you need to select the “Set system hostname” and update it accordingly.
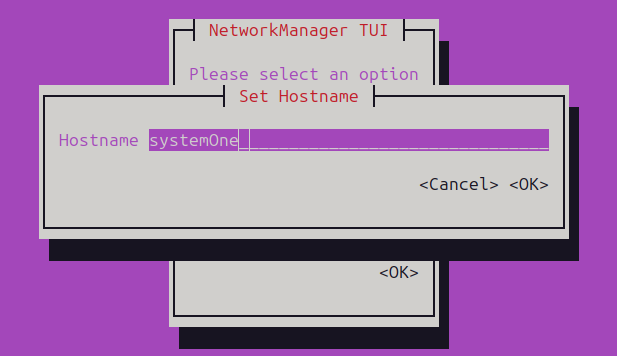
Finally, you will be prompted to provide your password to authenticate the process and you will be good to go.
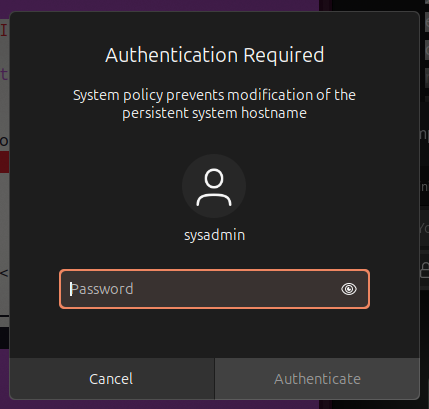
You can run the hostnamectl command to confirm the changes.

On the other hand, if you want to do it through the command, you can run the following in your terminal:
$sudo nmcli general hostname <enter-desired-hostname>

Run the following to make sure that the changes have taken place.
$nmcli general hostname

That’s all you need to do to change the hostname through the the Network Manager.
Method 4: Using the Ubuntu System Settings
For a user-friendly way to rename your Ubuntu 24.04 machine, head to System Settings. Simply search for “Settings” in the Activities overview and navigate to the “System” section.
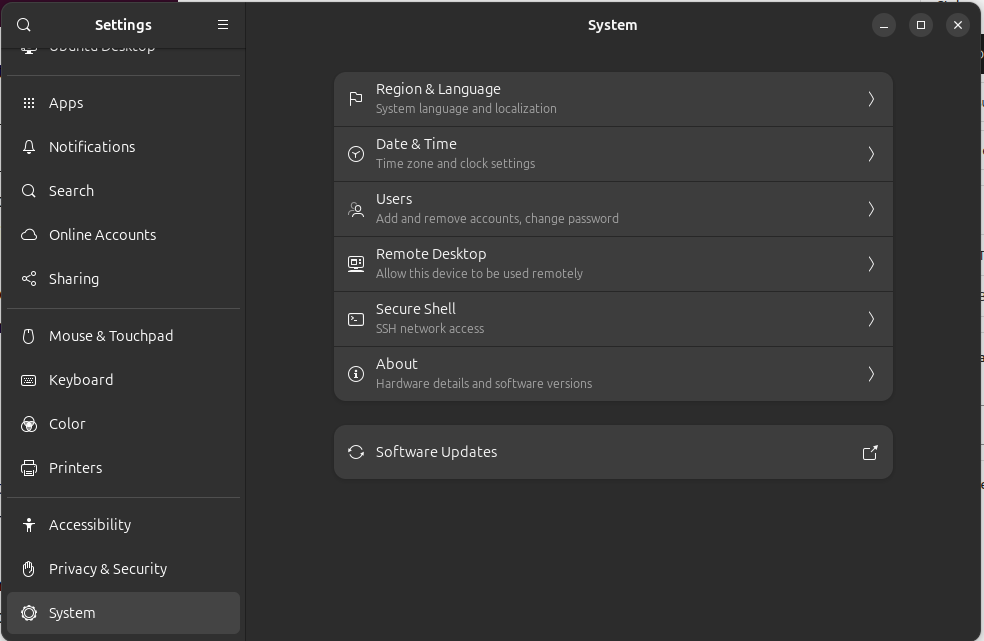
On the next screen, click on the “About Device” section. There, you’ll find a field labeled “Device Name.”
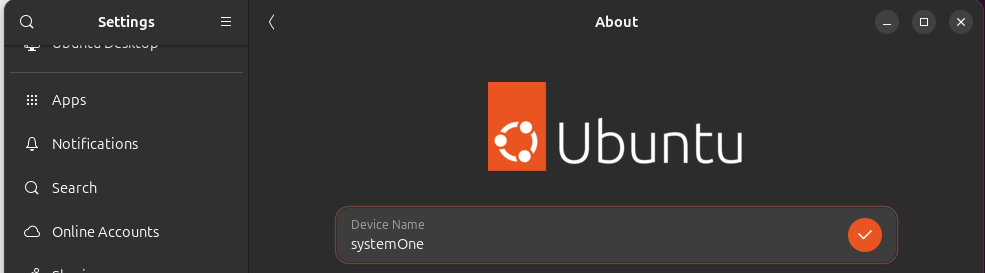
Just enter your desired hostname and click on the orange check button to give your system a new, personalized identity.
Conclusion
In conclusion, with the methods outlined above, you have a toolbox fit to help you change hostname in Ubuntu 24.04. Whether you prefer the command line’s efficiency with hostnamectl or the graphical approach through System Settings, choosing a clear and descriptive hostname improves organization and simplifies managing your machine. Remember, a well-chosen hostname can make a big difference in your Ubuntu experience! Keep visiting Linux World.