Have you ever needed to track changes in your code or collaborate with others on a project? Git, a powerful version control system, is the tool you need! Git helps manage changes in source code during software development and facilitates collaboration by allowing multiple developers to work on the same project simultaneously. With Git, you can keep track of changes you make to your code, go back to earlier versions if needed, create different versions of your project to try out new ideas, and branch out to experiment with new features. Let’s explore how to install and set up Git on Ubuntu 24.04 LTS so you can begin taking advantage of these features.
Also, read How to install Git on Ubuntu 22.04
How to Install and Configure Git on Ubuntu 24.04 LTS
Installing and configuring Git on Ubuntu is a straightforward process. Whether you’re setting up Git for personal use or a development team, here’s a comprehensive guide to get you started.
Phase 1: Getting Started with Git
- Method 1: Installing Git from the Default Repositories (Using APT)
- Method 2: Installing Git Using PPA (Personal Package Archive)
Phase 2: Verifying Git Installation
Phase 3: Customizing Git Settings
Phase 4: How to Use Git After Installation
Follow this guide to learn how to set up Git on Ubuntu 24.04 LTS for efficient version control and collaboration.
Phase 1: Installing Git
Method 1: Installing Git from the Default Repositories
Before you begin using Git, you need to install it on your Ubuntu system. The Ubuntu terminal makes it simple to accomplish this. Let’s explore the steps:
Step 1: Update Package Index
Before installing any software, it’s always a good idea to update your package index to ensure you’re getting the latest version available.
sudo apt update

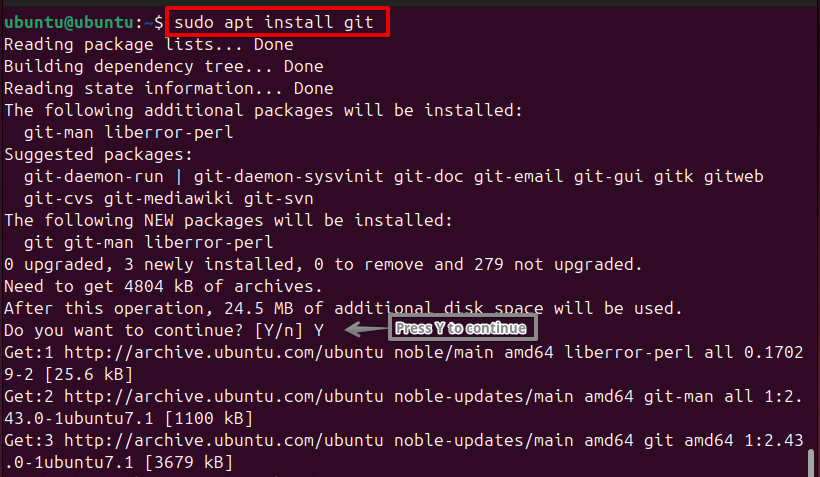
Step 2: Install Git
Installing Git is typically quick and requires minimal configuration. Once your package index is updated, you can install Git with the following command:
sudo apt install git
The command above will install Git and its dependencies as shown below:
Tip: It’s ideal for most users who need a stable and well-supported version of Git.
Method 2: Installing Git Using PPA (Personal Package Archive)
Using a PPA can be useful if you need a specific version of Git that is unavailable in the default repositories. This method combines the flexibility of source installations with the simplicity of APT.
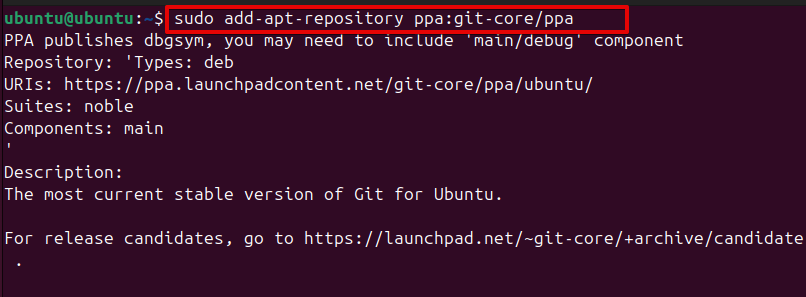
Step 1: Add the Git PPA
A Personal Package Archive (PPA) basically allows you to install software packages that are not available in the default Ubuntu repositories. You can ensure that you get the latest version of Git by adding Git PPA.
sudo add-apt-repository ppa:git-core/ppa
Step 2: Update Package Index
Update your package index once the PPA has been added.
sudo apt update

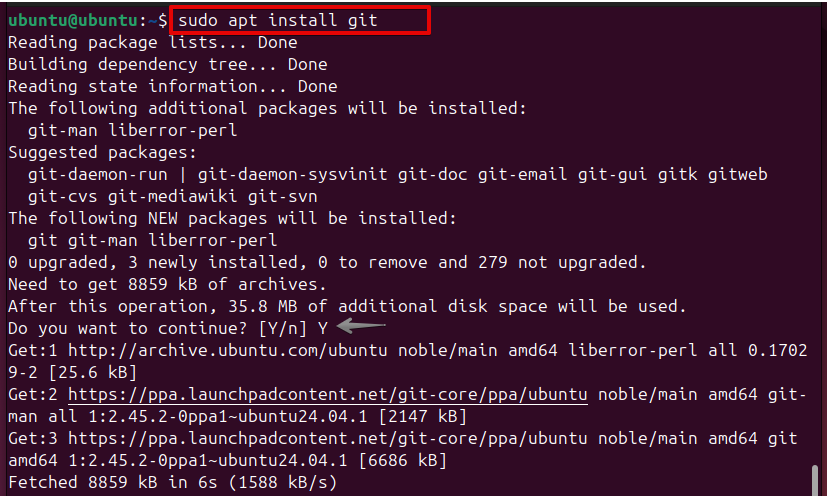
Step 3: Install Git
Install Git using the apt command:
sudo apt install git
Phase 2: Verifying Git Installation
To confirm that Git has been installed successfully, you can check its version:
git –-version
You should see an output indicating the installed version of Git.

Phase 3: Configuring Git
Once Git is installed, you need to configure it to suit your needs. This includes setting your user name and email, which are used for commit messages. Here’s how to configure Git:
Step 1: Configure Your Username and Email:
Git relies on your email address and name for tagging commits. Set these configurations globally for all repositories with:
git config --global user.name "Your Name"
git config --global user.email "[email protected]"

Tip: The –global flag sets these configurations for all Git repositories on your system. If you want to use different settings for a specific repository, you can omit the –global flag and run these commands within the repository.
Step 2: Configure Default Text Editor
Git uses a text editor for writing commit messages and other tasks. You have the option to specify your preferred text editor:
git config --global core.editor nano

You can replace Nano with vim, or any other editor of your choice.
Step 3: Set Up Aliases
To streamline your Git workflow, you can set up aliases for commonly used commands. For example:
git config --global alias.br branch
git config --global alias.ci commit

These aliases allow you to use shorter commands, making your workflow faster and more efficient.
Once you’ve set up your aliases, using them is simple. Here are a few examples:
Instead of typing git branch, you can now type git br to list all branches or create a new branch.
Instead of typing git commit, you can now type git ci to commit your changes.
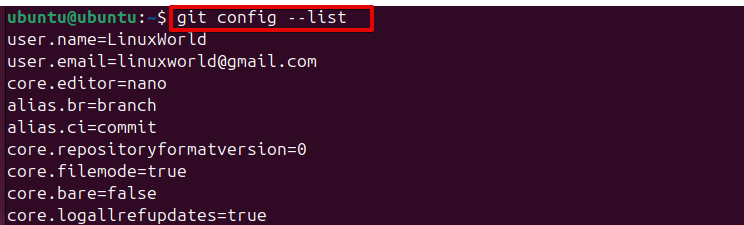
Step 4: Verifying Your Git Configuration
Use the git config –list command to view a list of all Git configurations, including your aliases:
git config –list
Phase 4: How to Use Git After Installation
Once Git is installed, you can start using it with the following steps:
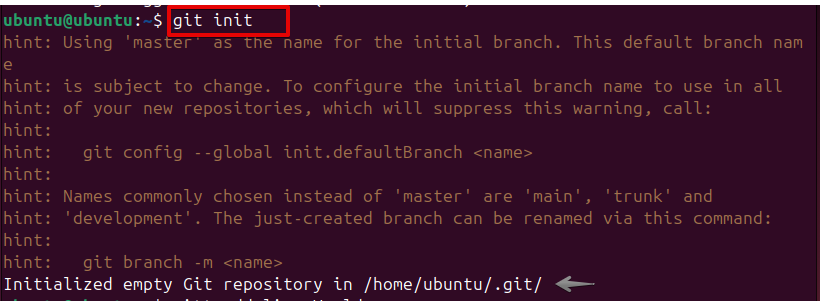
Set up a New Git Repository: In the project directory, create a new repository.
git init
Add Files: Stage files for commit.
git add filename # Add specific file

git add . # Add all files

Commit Changes: Save your staged changes with a message.
git commit -m "Your commit message"

Check Status: See which files are staged, unstaged, or untracked.
git status

View History: View the commit history.
git log

Congratulations! You’ve successfully installed Git, set up your repository, and are now ready to track your code changes like a pro. Happy coding!
Conclusion
Installing Git on Ubuntu 24.04 LTS can be done in several ways to suit different needs. The APT method offers a quick and easy installation for most users while using a PPA provides flexibility for those needing specific versions. After installation, configuring Git with your user details, preferred text editor, and aliases streamline your workflow, making Git operations more efficient. Whether you’re initializing a repository, adding files, or viewing commit history, Git on Ubuntu 24.04 LTS ensures efficient version control and collaboration for your development projects.