Firewalls are an essential component of system security, acting as a barrier between your internal network and external threats. They control the flow of incoming and outgoing traffic based on a set of security rules, thereby protecting your system from unauthorized access and potential cyber-attacks. In Ubuntu managing firewall rules is made easier with the Uncomplicated Firewall (UFW) tool, which even those with little networking knowledge may use.
Ubuntu 24.04 LTS is a stable and robust release that ensures continuous security updates and support. A firewall is crucial for maintaining this security and preventing unauthorized access. UFW is a user-friendly tool that allows you to manage firewall settings via the command line interface (CLI) and a graphical user interface (GUI) called Gufw. In this tutorial, we’ll provide step-by-step instructions for configuring UFW using both methods, ensuring your Ubuntu system remains secure.
How to Set Up a Firewall with UFW on Ubuntu 24.04 LTS:
Master the art of configuring a firewall in Ubuntu 24.04 LTS with these essential methods. Each approach caters to different preferences and needs, providing you with the tools to ensure robust network security:
- Using Terminal | CLI: The standard method for setting up and managing your firewall directly through the command line.
- Using GUI | Gufw: A user-friendly graphical interface for configuring firewall settings without using the command line.
- Advanced Tip: Learn how to adapt firewall rules and settings in Ubuntu 24.04 LTS for enhanced control and customization.
Method 1: Using Terminal | CLI
The terminal is a powerful tool in Ubuntu that allows users to perform a wide range of tasks through various commands. UFW (Uncomplicated Firewall) provides an easy-to-use command-line interface for managing firewall rules.
Step 1: Open the Terminal
First, open the terminal by pressing CTRL + ALT + T or by searching for it in the applications menu. Once the terminal is open, it’s always a good practice to update your package lists before proceeding:
sudo apt update
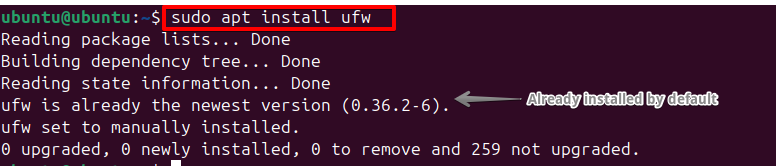
Step 2: Install UFW
UFW typically comes pre-installed in Ubuntu. Execute the following command if it isn’t already installed:
sudo apt install ufw
Step 3: Enable UFW
To start using UFW, you need to enable it. Enabling UFW will start the firewall and begin enforcing rules:
sudo ufw enable

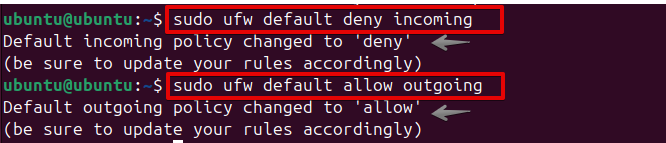
Step 4: Set Default Policies
Setting default policies is a crucial step in firewall configuration. It defines the baseline behavior for handling incoming and outgoing traffic. The recommended default is to deny all incoming traffic and allow all outgoing traffic:
sudo ufw default deny incoming
sudo ufw default allow outgoing
Step 5: Allow SSH Connections
To ensure you don’t lock yourself out of your server or remote system, it’s important to allow SSH connections before activating other rules:
sudo ufw allow ssh

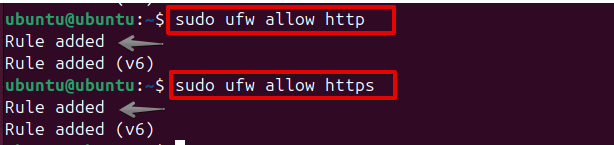
Step 6: Allow Specific Ports/Services
Based on your requirements, you might need to allow traffic on specific ports or for certain services. For instance, you must allow the ports HTTP and HTTPS to permit web traffic. If you’re setting up a web server, ensure that these ports are open to enable the server to function properly:
sudo ufw allow http
sudo ufw allow https
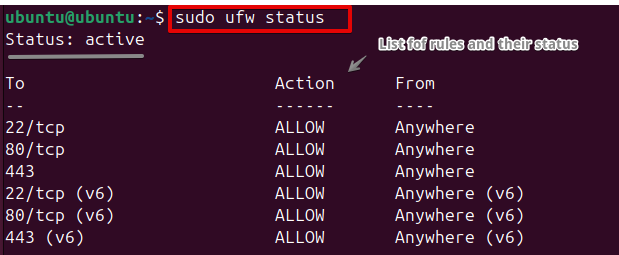
Step 7: Check UFW Status
After setting up the rules, you can check the status of UFW to see all active rules and verify that the firewall is active.
sudo ufw status
This command will display the list of rules and their status, confirming that UFW is up and running.
Advanced Tip: Adapting Firewall Rules and Settings in Ubuntu 24.04 LTS
Effective firewall management involves not only setting up rules but also modifying and removing them as needed. Adapting firewall rules and settings in Ubuntu 24.04 LTS ensures your system remains secure by allowing for easy modification and management of firewall configurations as security needs evolve.
The following commands are frequently used to manage UFW settings and rules:
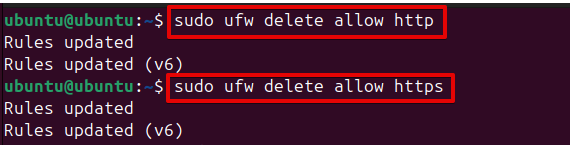
Delete a Rule: Run the following command to remove an existing rule:
sudo ufw delete allow <service/port>
For example:
- To remove HTTP and HTTPS rules (if no longer needed):
sudo ufw delete allow http
sudo ufw delete allow https
Disable the Firewall: If you need to disable the firewall temporarily, use:
sudo ufw disable

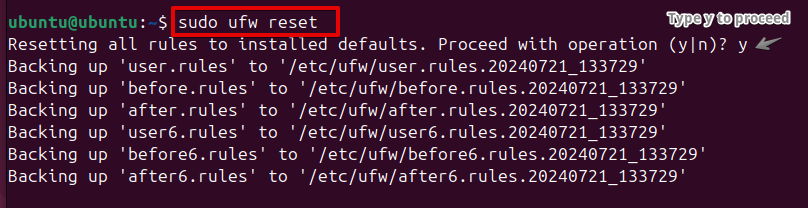
Reset UFW: To reset UFW to its default state, removing all rules and returning to the initial configuration, use:
sudo ufw reset
Method 2: Using GUI | Gufw
For users who prefer a graphical interface, Gufw provides a simple and intuitive way to manage UFW. Gufw is the graphical front end for UFW and can be easily installed and used to configure firewall settings.
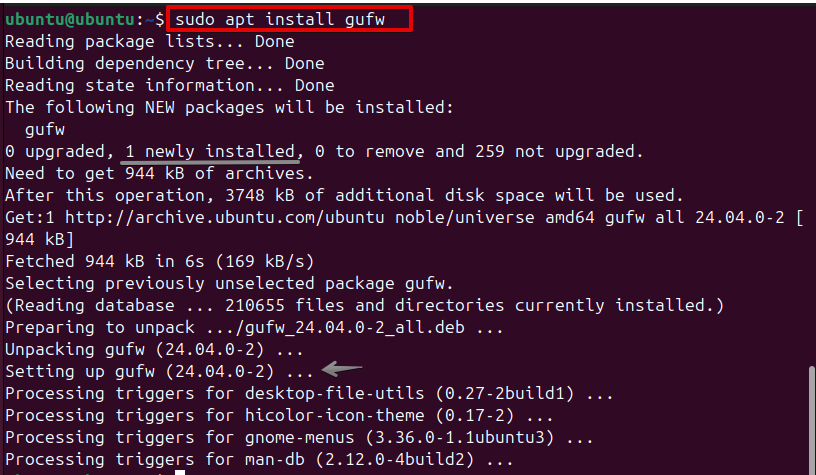
Step 1: Install Gufw
If Gufw is not already installed on your system, you can install it via the terminal:
sudo apt install gufw
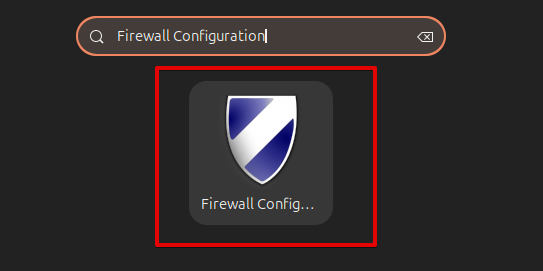
Step 2: Open Gufw
Once installed, open Gufw by searching for it in the applications menu. The application icon will typically be labeled Firewall Configuration.
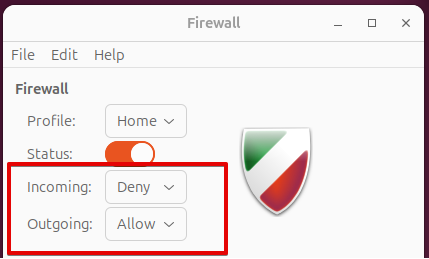
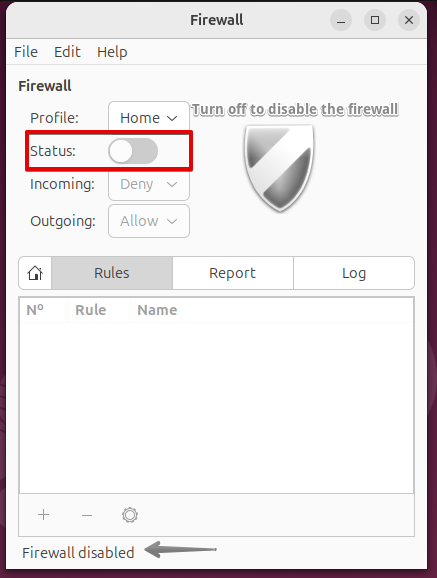
Step 3: Enable the Firewall
In the Gufw window, toggle the switch to enable the firewall. This will start UFW and begin enforcing the default rules.
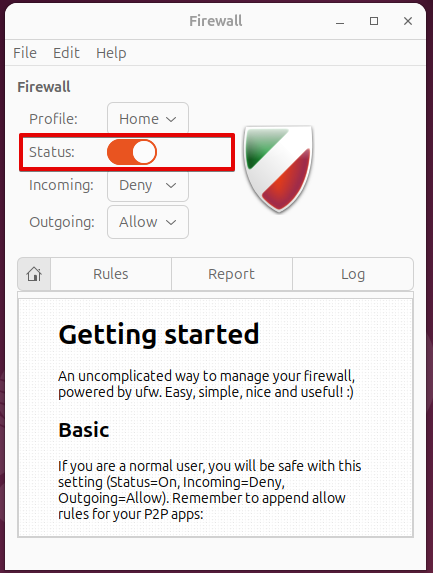
Step 4: Set Default Policies
Ensure that incoming traffic is denied and outgoing traffic is allowed. This can usually be done through a simple dropdown menu or toggle.
Step 5: Allow Specific Ports/Services
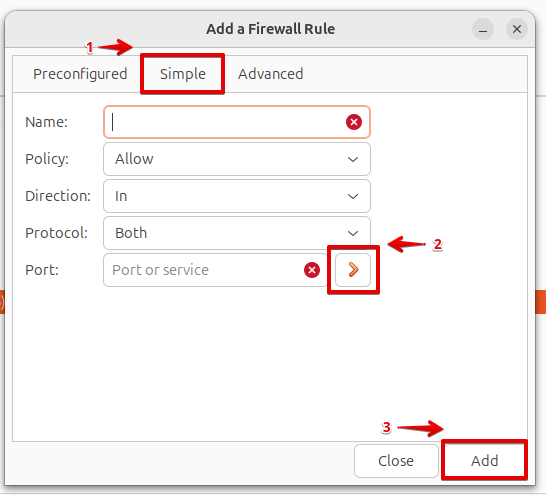
For this purpose, navigate to the Rules tab. To allow specific ports or services, click on the “+” button to add a new rule.
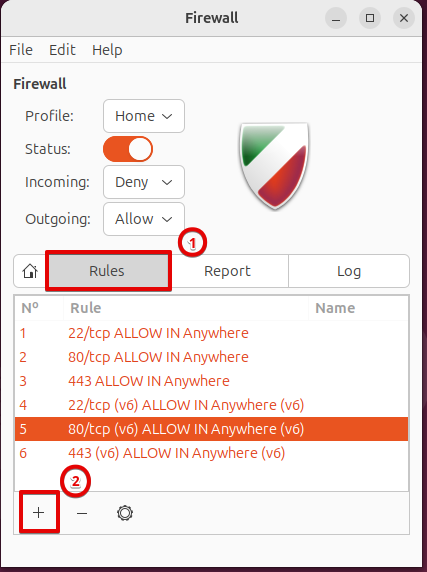
In the rule creation window, select the Simple tab and choose the service or port to allow (e.g., SSH, HTTP, HTTPS). Add these rules by specifying the port numbers and protocols.
Step 6: Apply and Confirm
After adding the necessary rules, confirm that the firewall is active by checking the status in Gufw. The status window will show all active rules and their current state.
Advanced Tip: Adapting Firewall Rules and Settings in Ubuntu 24.04 LTS
Effective firewall management is essential for maintaining a secure system, and Gufw makes this process straightforward. Here are the key steps for managing your firewall rules using Gufw:
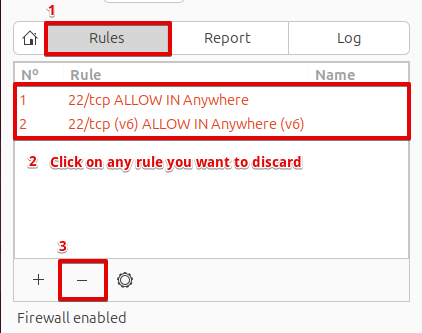
Delete a Rule: To delete an existing rule, select the rule in the list and click the “–” button.
Disable the Firewall: To disable the firewall, toggle the switch to off in the main Gufw window.
Conclusion
Setting up a firewall with UFW on Ubuntu 24.04 LTS is a crucial step in securing your system. This tutorial provided detailed instructions for both command-line and graphical interface methods, ensuring that users can choose the approach that best suits their preferences. By enabling UFW, setting default policies, and allowing necessary services, you can effectively protect your system from unauthorized access. Additionally, managing firewall rules using UFW commands or Gufw makes it easy to adapt to changing security requirements.