
In Ubuntu, the term “sudo” stands for “superuser do” and is a powerful command that allows users to perform tasks that require administrative privileges. By default, only the root user has full administrative access to the system, but this can be delegated to other users by adding them to the sudo group. This is crucial for installing software, modifying system configurations, and managing user accounts.
One of the most important administrative tasks in Ubuntu is giving a user sudo rights. It allows you to delegate specific administrative capabilities without providing full root access. This enhances security by enabling users to execute commands with elevated privileges only, when necessary, while still being able to perform routine tasks as a regular user.
How to Add User to Sudo Group in Ubuntu 24.04 LTS
In Ubuntu 24.04 LTS, there are several ways to add users to the sudo group, each tailored to different preferences. Whether you prefer the command line for its precision, the graphical user interface (GUI) for its simplicity, scripting for automation, or directly editing system files, this guide covers all methods to ensure effective user management.
- Using the Command Line: Utilize commands for precise and controlled addition of users to the sudo group.
- Using the GUI: Add users to the sudo group through Ubuntu’s settings interface for a visual approach.
- Automating with Scripts: Implement scripts to streamline the process of adding multiple users to the sudo group at once.
- Editing the /etc/group File: Directly edit the system files for a manual approach.
- Editing the sudoers File with visudo: Safely modify the sudoers file to manage sudo privileges.
Each method is explained step-by-step to make the process easy and efficient.
Method 1: Adding a User to the Sudo Group Using the Command Line
Adding users to the sudo group via a terminal is efficient and straightforward. Here are the different commands you can use:
Using usermod
The usermod command is a high-level command for managing user accounts.
Step 1: Open the Terminal
Launch the terminal using the keyboard shortcut Ctrl+Alt+T, or look up Terminal in your program menu.
Step 2: Add User to Sudo Group
Enter the following command and hit Enter to finish this process:
sudo usermod -aG sudo username
Ensure you replace username with the actual username of the user you are adding to the sudo group.

Using adduser
The adduser command is another straightforward method.
Step 1: Open the Terminal
Launch the terminal using the keyboard shortcut Ctrl+Alt+T, or look up Terminal in your program menu.
Step 2: Add User to Sudo Group
Execute the following command, substituting the username with the actual one.
sudo adduser username sudo

Using gpasswd
The gpasswd command is useful for group management.
Step 1: Open the Terminal
Launch the terminal using the keyboard shortcut Ctrl+Alt+T, or look up Terminal in your program menu.
Step 2: Add User to Sudo Group
Substitute the actual username for username when running the following command:
sudo gpasswd -a username sudo

Verifying the Addition
To verify that the user has been added to the sudo group, use the groups command:
groups username
You should see sudo listed among the groups.

Method 2: Adding a User to the Sudo Group Utilizing GUI (Graphical User Interface)
For those who prefer a graphical interface, Ubuntu provides an easy way to manage user groups through its settings. Here’s a step-by-step guide:
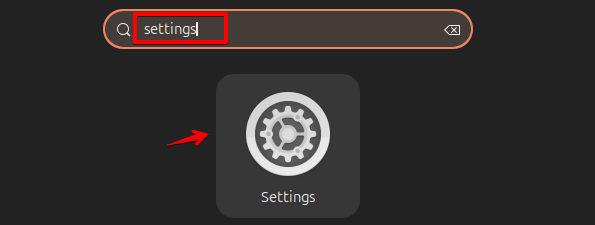
Step 1: Open Settings
Search for “Settings” in your application menu and open it.
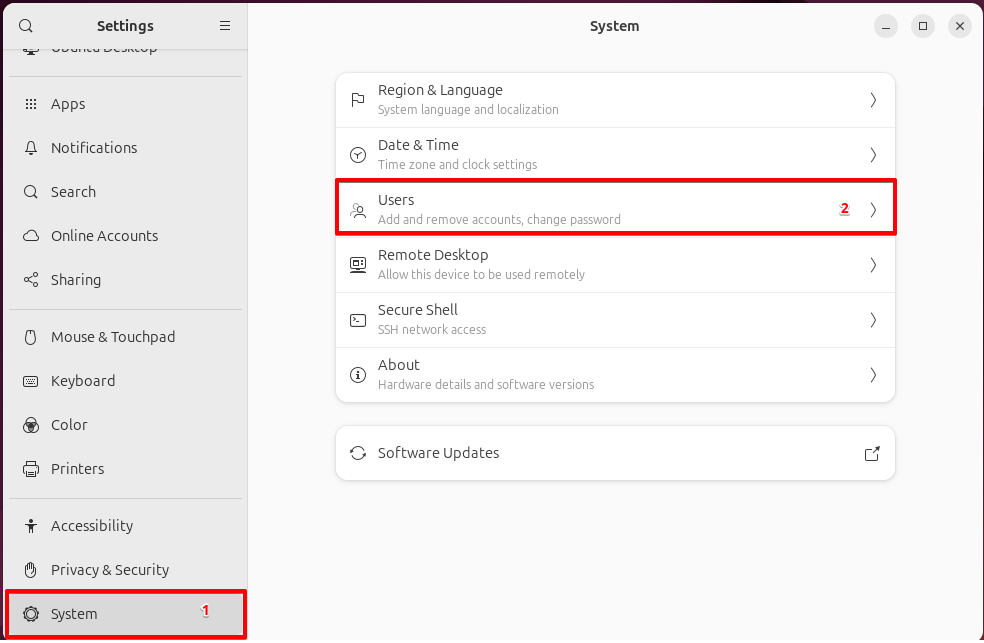
Step 2: Access Users Section
In the Settings window, use the search bar at the top and type Users.

Alternatively, navigate to the bottom of the sidebar and select System, then click on Users from the options available in the System settings.
Step 3: Unlock User Management
Click the Unlock button in the upper right corner, enter your administrative password, and press Authenticate.

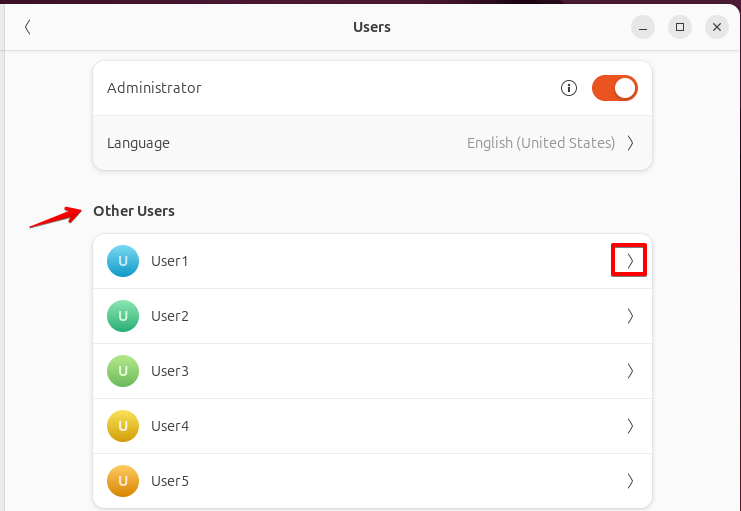
Step 4: Select the User
Click on the user account you want to modify.
Step 5: Change to Administrator
Toggle the user to Administrator to grant sudo privileges.
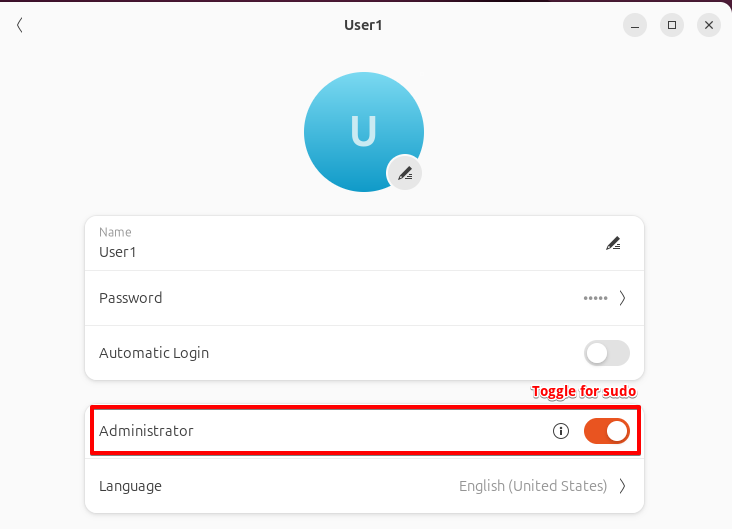
The user now has administrative (sudo) privileges.
Method 3: Automating User Addition to Sudo Group with Scripts
Automating the process can be particularly useful for bulk user management. Here’s how you can use scripts to add users to the sudo group efficiently:
Step 1: Open the Terminal
Launch the terminal using the keyboard shortcut Ctrl+Alt+T, or look up Terminal in your program menu.
Step 2: Create a Script
Use a text editor to create your script. For instance, using nano:
nano add_sudo_users.sh

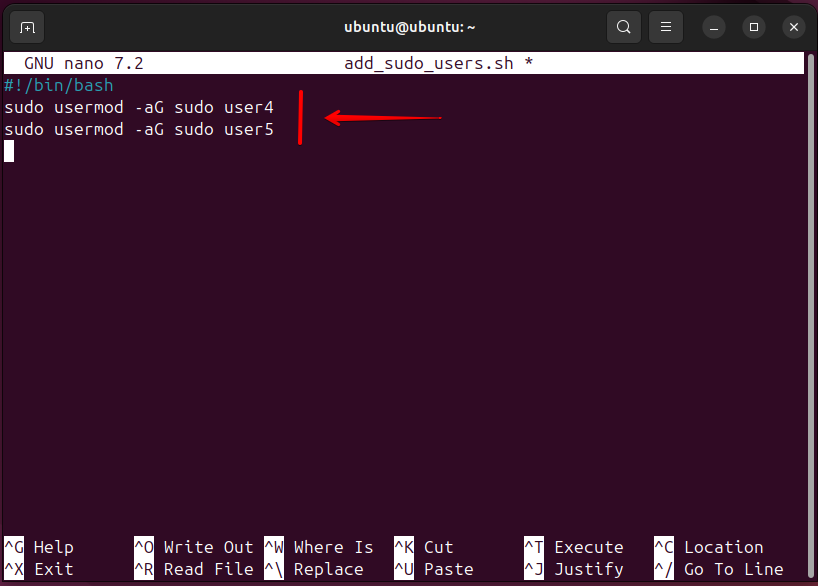
Step 3: Add Script Content
Insert the following content to the script:
#!/bin/bash

sudo usermod -aG sudo username1

sudo usermod -aG sudo username2
Replace username1, username2, etc., with the actual usernames you want to grant sudo privileges to.
To save your modifications, press Ctrl+O to save the file, then exit the text editor by pressing Ctrl+X.
Step 4: Make the Script Executable
Use the chmod command to grant execute permissions to your script:
chmod +x add_sudo_users.sh
![]()
Step 5: Run the Script
Run the script as instructed below to add the users to the sudo group:
./add_sudo_users.sh
Method 4: Editing the /etc/group File Directly
To include a user in the sudo group by manually editing the group file, follow these steps:
Step 1: Open the Terminal
Press simultaneously Ctrl+Alt+T to open the terminal, or look up Terminal in your program menu.
Step 2: Edit the /etc/group File
Use a text editor such as nano to access and edit the /etc/group file:
sudo nano /etc/group

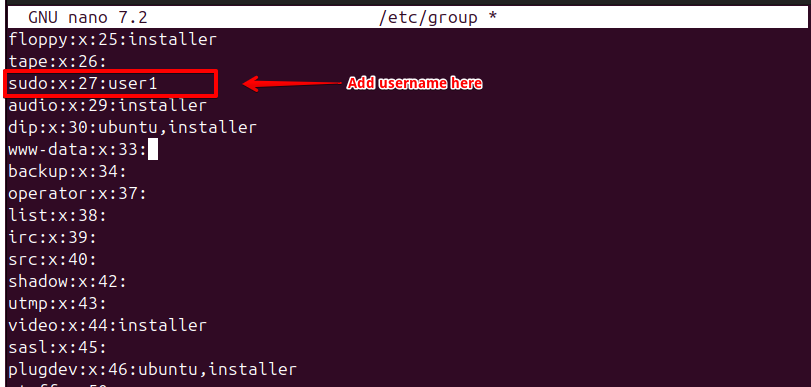
Step 3: Find the sudo Group Line
Locate the line that starts with sudo. It will look something like this:
sudo:x:27:
Step 4: Add the Username
Include the username towards the end of the line, using a comma for separation. For instance, to add a user named username:
sudo:x:27:username
Step 5: Save and Close the File
Save the changes and close the text editor (in nano, press Ctrl+O, followed by the enter and then Ctrl+X)
Method 5: Editing the sudoers File with visudo
Editing the sudoers file using visudo is a powerful way to manage sudo permissions. This method is particularly useful for granting privileges to users without adding them to the sudo group.
Step 1: Open the Terminal
Press simultaneously Ctrl+Alt+T to open the terminal, or look up Terminal in your program menu.
Step 2: Using visudo to open the sudoers File
The visudo command can be used to safely edit the sudoers file.
sudo visudo
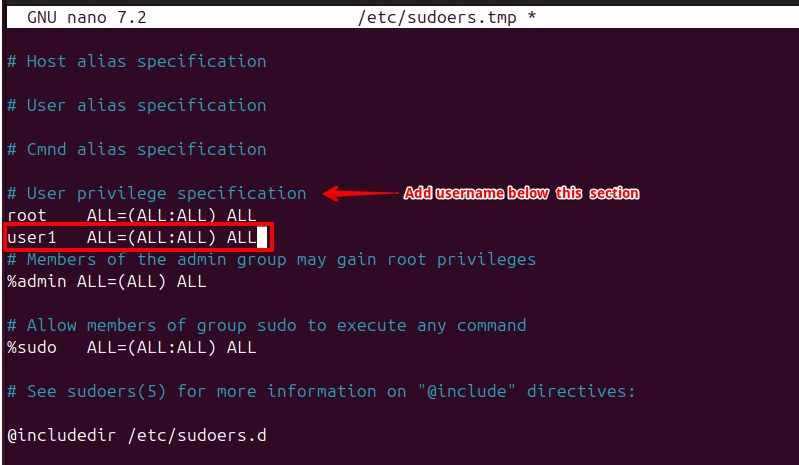
Step 3: Add the User to the sudoers File
Locate the line that defines user privileges. Typically, you will see a line like:
root ALL=(ALL:ALL) ALL
Below this line, add a new line for the user you want to grant sudo privileges to:
username ALL=(ALL:ALL) ALL
Enter the actual username you wish to add.
Step 4: Save and Exit
Save and close the visudo editor:
If using nano, press Ctrl+O and enter. Next, to exit the editor, use Ctrl+X.
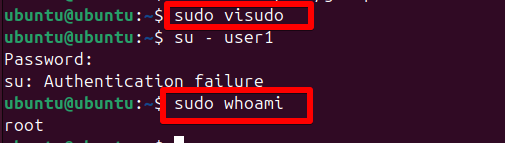
Step 5: Verify the Addition
You can switch to the user and try executing a command with sudo to confirm that the user now has sudo privileges
su - username
sudo whoami
If everything is configured correctly, the output should be root.
Conclusion
In summary, adding users to the sudo group in Ubuntu 24.04 LTS is essential for managing administrative privileges. Ubuntu provides multiple methods to accomplish this. The command line offers a quick and efficient way to add users, while the graphical user interface (GUI) caters to those who prefer a visual approach. Additionally, scripting is a powerful tool for automating the addition of multiple users to the sudo group. Editing the /etc/group file allows for direct manual adjustments, and using visudo ensures safe and precise modifications to the sudoers file.
By following the steps outlined in this guide, you can ensure your system remains well-managed and secure, with appropriate administrative privileges granted to the necessary users.
Keep visiting Linux World.